Salesforce Obscura: Nonprofit Data Pipeline On the Cheap (Part 4): Skyvia
The vital glue that lets all this happen

So far in this series, we have explored why you might want to set up a simple and inexpensive data pipeline from Salesforce to Azure SQL Server, and how to prepare your Azure SQL Server environment. This article takes you through using Skyvia as a relatively inexpensive, simple, and reliable connector between the two.
This article will take you through:
- Creating your Skyvia connection to Salesforce
- Preparing your Azure environment to allow Skyvia to connect
- Creating your Skyvia connection to your SQL Server environment
- Setting up your replication
- Setting up the scheduled sync
- Considering ongoing maintenance
The work we outline in this step is often the realm of a data engineer or someone very similar. A data engineer is someone with a foot in a few different worlds, but with a focus on efficiently and correctly moving data from one source to another. You may have heard the term “data pipeline” — how data flows from one database to another. A data engineer typically designs and executes on the data pipeline based on your unique needs.
For this type of very simple setup, your Salesforce systems administrator can execute on these steps and would often be the one to oversee the maintenance of the synchronization and the Skyvia job itself.
Why Skyvia instead of something else?
I don’t really have a strong opinion in any direction about the tool used to get the job done. Whatever you can afford, sustain and support is the right tool for you.
While I’ve touched most ETL tools in my career, these days I only care about whether the tool is affordable for a midsized nonprofit and if it’s sustainable for that same midsized nonprofit, who doesn’t have a coder on staff to tend to an ETL solution or roll their own. I mostly need to reliably ship data from point A to point B. I’ve been impressed by Skyvia. It grew out of a well-established ETL firm, it’s secure, and easy to use, so that’s what this series is describing. Your mileage may vary.
What Skyvia components will you need?
We use all of Skyvia’s products for different needs, but if you’re just getting started, set up your trial by going to their Replication use case. You will need their Data Integration and Query products for this work (as of May 2023).
Once you have your trial, you can set up your replication.
Step 1: Create your Connection to Salesforce
A Connection is a reusable way in which you connect to different resources — your Salesforce instance and SQL database, in this case.
From the top menu bar, Click +New then choose Connection

In the list of connectors, search for Salesforce
Then click on the “Salesforce” logo to go to your Salesforce connection setup screen.

On the Connector Setup Screen:
Click on the word “Untitled” to edit inline the name of your connector. Name it something descriptive, like “Salesforce Production Instance” or “Salesforce Demo Sandbox.”
Choose whether you are connecting to Production or a Sandbox.
Then click “Sign in with Salesforce” to authenticate. Note that you can — and probably should — authenticate with an API only or service user that has only the required permissions to perform a read on the objects you plan to store in your data warehouse, just as a best practice with stored accounts from any source.
Adjust the Metadata Cache if needed. This tells Skyvia how often to refresh the metadata (the objects and fields list) since it, like most products, minimizes the API calls to Salesforce by caching the metadata definitions itself. If you frequently add fields or objects, set the cache to be more frequent; if you are syncing slower-moving objects, leaving the cache to Infinite is fine, just note you will need to refresh the cache manually when you do make a change to Salesforce that Skyvia needs to know about.
Test Connect then Create
And you’re done with Connection #1 to your Salesforce org.

Step 2: Prepare your SQL Server instance to allow Skyvia to Connect
Remember that your SQL Server will reject all attempts to connect that aren’t from a recognized IP address.
Log into your Azure portal
Find your list of resources and choose the database you created in article 3 of this series. Click on the one that says “SQL Database” (not SQL Server).

As with allowing your own personal IP to connect, you now need to let Skyvia’s IPs connect.
Click on “Set Server Firewall”

Scroll a bit until you see “Firewall Rules” then click + Add Firewall Rules

Give your rule a name (we usually use “Skyvia”) and in both the start and end IP addresses type in 52.190.252.0. Then hit “OK”

Note that Skyvia, like any other cloud provider, occasionally needs to change its IP addresses so you will need to adjust this over time.
NOTE: Your changes are not saved until you click “Save” at the bottom of this screen!
Step 3: Create your Connection to your SQL Server instance
You will want to connect to the SQL Server database that you created in the 3rd article in this series.
And specifically, you want to connect it to the SF schema user (NOT your admin!).
From the top menu bar, Click +New then choose Connection
In the list of connectors, search for SQL
Then click on the “SQL Server” logo to go to your Azure SQL Server connection setup screen.

On the Connector Setup Screen:
Click on the word “Untitled” to edit inline the name of your connector. Name it something descriptive, like “Data Warehouse SF Schema.”
In Connection Mode, choose Direct.
In Server, put the server name of the database server that you set up in the last article. It is the same one you used in testing your connection in Azure Data Studio. If you aren’t sure what it is you can go to your Azure portal, find your database, and see it in the main information bar. Do not prefix it with https://! Make it identical to what you see in Server Name on your Azure portal.

In User ID, put the user ID of the Salesforce Schema user you created. If you followed the demo exactly, this would be SFSchemaUsr.
In Password, put the password of the SFSchemaUsr.
Click on Database. If you set up your firewall rules correctly (and remembered to save them) you will see a drop-down that shows the master db as well as your own database. Choose the database you set up.
Click Test Connection then Create Connection.

Step 4: Set up a Replication job
Skyvia’s replication is a simple, efficient, and reliable “set it and forget it” solution that will:
- create the SQL tables for you
- populate them with your Salesforce data
- then at whatever frequency you prefer, perform incremental updates (add new records, update changed records, and delete records).
Also note that when you first set up your sync, you may have more rows than your subscription limits, because you are first populating all records. Once you get into the incrementals it should drop to within your subscription levels. You will get charged a modest fee for going over your limits, so just be aware of the total number of records that you’re working with and plan accordingly.
From the top menu bar, Click +New then choose Replication

On the Connector Setup Screen:
Click on the word “Untitled” to edit inline the name of your connector. Name it something descriptive, like “Nightly Sync between SF and SQL.”
For Source, choose the Salesforce connector you set up in step 1.
For Target, choose the SQL Server connection you set up in step 2.
Leave Incremental Updates and Create Tables checked.
You may want to uncheck “Create foreign keys”.
Note that at this time we are still trying to solve a problem that is more of a SQL than Skyvia problem. We prefer to have SF lookup fields set as foreign keys in SQL. However this means that a delete will time out in larger/more complex data structures. We’re exploring whether indexing will solve the problem.

Once you have chosen your source data, the right-hand side of the screen will populate with your Salesforce schema.
Check the boxes next to the objects you wish to replicate from Salesforce into SQL Server. Note that with large objects, the replication jobs can exceed their limits and you may need to break your replication into multiple parts depending on your specific use case.
To see what you have selected, click on “Show all” — this will toggle your view to “Show selected only.”
By default, all fields in the selected objects will be replicated. If you want to exclude certain fields, click the pencil icon next to your selected object and uncheck the fields that should not be replicated.

Click “Validate” to ensure nothing is glaringly wrong with your replication setup. Then click “Create.”

Once you have created the package, you can run it. Note that, as the alert will tell you, this will likely take a long time. Skyvia does a good job of working in bulk and working to have as soft as possible an impact on Salesforce resource limits, so your initial sync may be faster than you think.

You can monitor the job’s success on the Monitor tab. You should get messages that tell you what was successfully completed and what, if any, failures occurred.
If you get failure notifications, you will need to fix them and try again.
Step 5: Set up the Schedule
Once you have a successful first sync, all of your data will be in SQL Server, in the SF schema, in tables named the same thing as your Salesforce objects and with all fields created with their API names.
You’re ready to set this up to run on a schedule and know that data is flowing from SF to SQL Server regularly.
In your replication job, click on “Schedule”

A window will appear asking you to set up some basic scheduling parameters. You have already chosen incremental in the model’s settings, so this is just setting up when the solution will run.

Congratulations! You have set up a sync that will allow you to use SQL to work with your Salesforce data!
You can stop here if you want. That may be all you need if all you want to do is have a SQL database to work within.
Note that SQL Server by itself has no method to execute scripts on a schedule. You either need an Azure Automation account to create runbooks or you may be able to use Skyvia’s new (in 2023) Automation feature. The last article in this series will talk in general about how we approach these questions in case you need to take it that one step further.
Step 6: Preparing for Ongoing Maintenance
Salesforce lets you add objects and fields so quickly that we often forget there are consequences and things to plan for in enterprise environments.
Now that you have connected your Salesforce to a data warehouse, you have to plan for ongoing maintenance.
Whenever you add a field to Salesforce, if the object is in your replication package and your metdata cache auto-refreshes, your replication may break because it has no corresponding field in SQL.
You must now:
- manually add the new field with the correct data type to the SQL database
- refresh the Skyvia metadata cache so it picks up the new field from Salesforce
- confirm that your new field is checked in the Skyvia replication model (click the pencil to see all the fields, look for your new field, check the box if it’s unchecked).
The hardest part is remembering to do these steps before your nightly sync job breaks on you. We recommend just adding these steps to your internal policies and procedures relating to Salesforce administration.
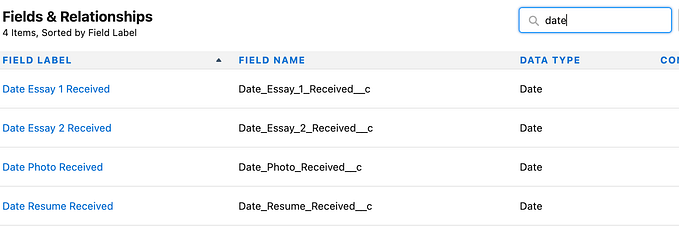
Let’s say you add My Custom Field (API name: My_Custom_Field__c) to the Contact object, and it’s a long text field. The Contact object is part of your nightly replication and is in the SF schema.
You would use Azure Data Studio to connect to your SQL server as an administrator. And you would execute the following SQL command:
Alter table [SF].Contact add My_Custom_Field__c varchar;
This will add a varchar field with the same name to your SQL table, so that Skyvia can add your new field’s data nightly.
What’s in this series?
You should read these in the order listed below.
- Overview — introduces the series and outlines our example use case
- Salesforce and the data visualization ecosystem — this article, which explores the more conceptual aspects of data and reporting
- Setting up SQLServer as a Data Warehouse — the steps to set up SQLServer in an Azure environment to meet the requirements of being “good enough” for this use case
- Setting up SkyVia to replicate your Salesforce data into SQLServer — the steps to use SkyVia to pull data from Salesforce into SQLServer on a regular basis
- Transforming data inside your SQLServer for visualization — the overview of why you’d have data in SQLServer in the first place, what your automation options are, and how you might use this thinking to support visualizations
FAIR WARNING: YOU GET WHAT YOU PAY FOR WHENEVER DATA IS CONCERNED. Analysis on the cheap is going to be bad analysis and the more powerful the toolkits the more that can go wrong. I am focusing only on building an affordable data pipeline and storage solution, which are things that are likely in reach for a sufficiently technical Salesforce administrator.
If you read this series and feel despair at executing on this stuff yourself, reach out. We at Deep Why focus on making your Salesforce ecosystem work really well, which can include getting it into an Azure data warehouse. Our friends at Inciter specialize in helping you understand your data and making all of your reporting needs seamless and easy. We often work together, so if you’re not sure just shout and we’ll get you to the right team.